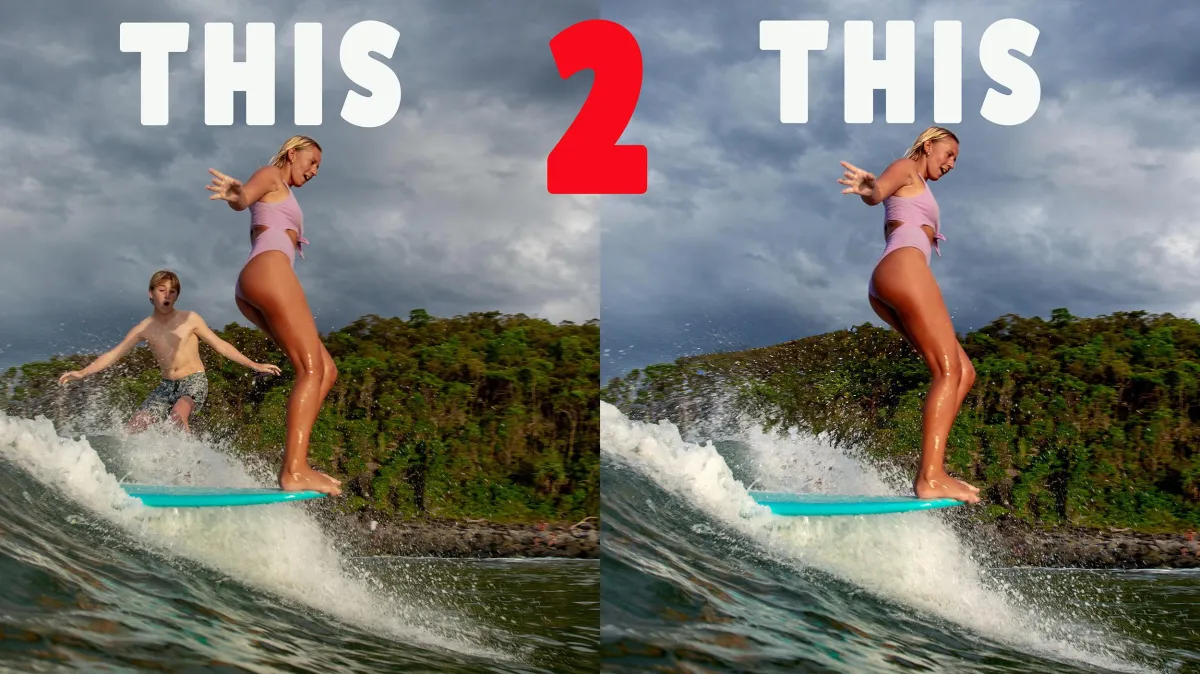
How to Remove Unwanted Objects from Your Photos in Photoshop (The Easy Way)
Ever taken a cracking shot, only to realise there’s a power pole, stranger, or weird shadow ruining the frame? You’re not alone. Whether you’re shooting surf action, portraits on the beach, or travel scenes with random clutter, knowing how to clean up your images can be the difference between a banger and a bin-it.
In this tutorial, I’m diving into one of Photoshop’s most powerful (and underrated) tools: the Remove Tool. If you’re still using the clone stamp or healing brush for this stuff, it might be time for an upgrade.
What is the Remove Tool in Photoshop? The Remove Tool is a relatively new feature in Adobe Photoshop that lets you erase unwanted parts of an image with minimal fuss. Unlike the clone stamp or patch tool, it uses Adobe’s AI-based content awareness to fill in the gaps seamlessly.
Why It Beats the Clone Stamp:
No manual sampling required
Automatically blends textures, light, and detail
Works on large or small objects
Saves you heaps of time
Common Things You Can Remove:
Strangers in the background
Powerlines
Stray surfers or swimmers
Poles, bins, road signs
Lens spots or splashes
How to Use the Remove Tool (Step-by-Step):
Open your photo in Photoshop (make sure you’re using a version that includes the Remove Tool).
Select the Remove Tool from the toolbar (it might be grouped with the Spot Healing Brush).
Adjust your brush size to suit the object you want to remove.
Simply paint over the object.
Photoshop auto-fills the area. Boom. It’s like it was never there.
Pro Tips for Better Results:
Zoom in for detailed work
Use smaller brush strokes on tricky edges
If it doesn’t look right the first go, hit undo and try smaller sections
Duplicate your layer before you start (so you can compare before/after)
When NOT to Use the Remove Tool: While it’s powerful, it’s not perfect for every scenario. If you're dealing with ultra-fine detail or overlapping subjects, manual edits with the clone or patch tool might still be your best bet.
Watch the Full Video Tutorial Want to see this tool in action? I walk through a real-world example in my full YouTube tutorial: 👉 Watch it here
Want to Go Deeper?
If you're ready to take your photography further and build true confidence behind the lens, check out my online courses. Inside my Confident Photographer Program AND Water Photographer programs, we work through creative exercises like this all the time—and right now, it comes with lifetime access to monthly group calls and a private community of legends who are all on the same path.
Explore the programs: https://www.waterphotographycourses.com
Want to Learn More?
If you're serious about building a professional workflow for your surf or water photography, check out my online courses:
👉 Confident Photographer Program
About the Author
Tom Woods is a professional commercial and surf photographer based on the Sunshine Coast, Australia.
With over 25 years of experience and thousands of published images under his belt, he now also mentors photographers worldwide through online courses and coaching.
Photography services website: www.stimages.com.au
Photography Tuition website: https://www.waterphotographycourses.com/
COMPREHENSIVE PHOTOGRAPHY
PROGRAMS
Click below to learn more about our impactful photography programs
WATER - LAND - PRO - BEGINNER - ADVANCED
Copyright 2022 All Rights Reserved


